

What Are Slab Foundations?
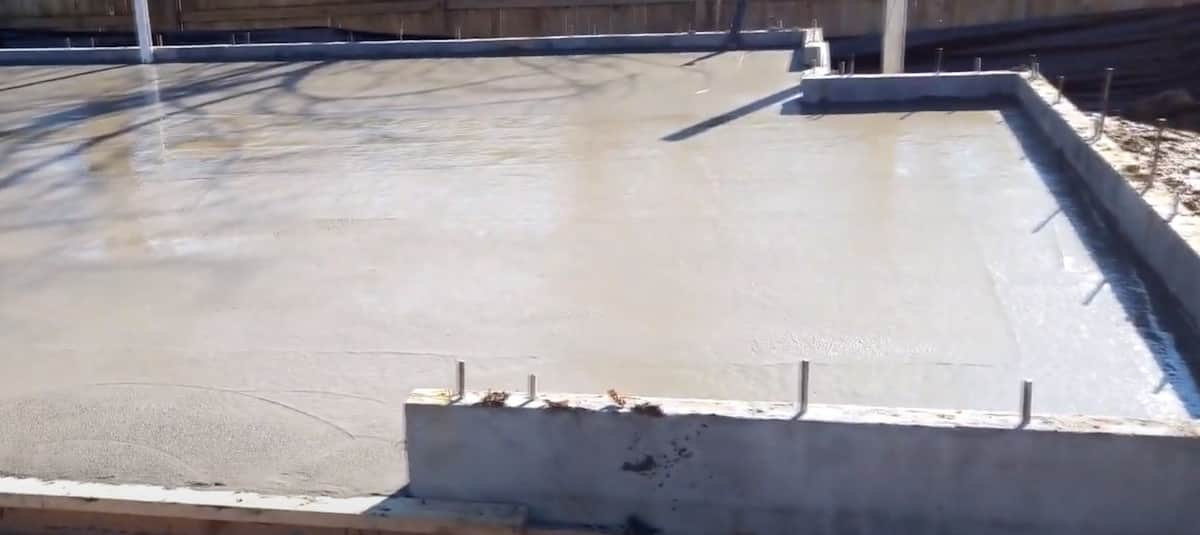
Slab foundations are a type of building foundation made by pouring concrete directly onto a prepared surface. These foundations are typically used to create a solid base for structures, ensuring stability and longevity. The concrete slab, which can vary in thickness depending on the structure’s needs, is poured over a layer of gravel or crushed stone to enhance drainage and prevent moisture issues.
Why Do We Use Slab Foundations When Constructing a Building?
Slab foundations are favoured in construction due to their numerous benefits and safety advantages. They provide a cost-effective and straightforward method for creating a stable base for buildings. Key benefits include:
- Durability: Slab foundations are highly durable, offering a strong and stable base that can support a structure for decades.
- Protection Against Pests: With no crawlspace or basement, slab foundations reduce the risk of pest infestations.
- Moisture Resistance: Properly constructed slab foundations help prevent moisture from seeping into the building, protecting it from mould and mildew.
- Energy Efficiency: Slab foundations can contribute to energy efficiency by reducing the space between the ground and the home, minimising air leaks.
Types of Slab Foundations and Their Features
There are several common types of slab foundations, each with distinct features and applications:
- Monolithic Slab:
- Features: A single pour of concrete is used to create both the foundation and the footing.
- Common Usage: Often used in residential homes due to its simplicity and cost-effectiveness.
- Why: Provides a solid, continuous base that supports the entire structure.
- T-Shaped Slab:
- Features: A concrete footing is poured first, followed by the slab, creating a “T” shape.
- Common Usage: Suitable for areas with frost, commonly used in colder climates.
- Why: The footing extends below the frost line, providing extra support and preventing heaving.
- Frost-Protected Slab:
- Features: Insulated edges around the slab prevent the ground beneath from freezing.
- Common Usage: Often used in colder regions for heated structures.
- Why: The insulation allows the use of a slab foundation even in freezing temperatures without the risk of frost heave.
- Raft Slab:
- Features: A thicker slab that acts as a raft, distributing the weight of the building evenly.
- Common Usage: Ideal for buildings on weaker or expansive soils.
- Why: Provides even weight distribution, reducing the risk of differential settling.
Understanding the Inspection Process for Pre-Slabs
Let’s discuss the whole process for pre-slab inspection.
What Happens During a Pre-Pour Inspection?
A pre-pour inspection is a critical step before the slab is poured. The process involves several key steps:
- Site Preparation Check: Inspecting the site to ensure proper excavation and that the formwork is correctly installed.
- Reinforcement Inspection: Checking that the steel reinforcement (rebar) is placed correctly according to the design specifications.
- Vapour Barrier Inspection: Verifying that a vapour barrier is in place to prevent moisture from rising through the slab.
- Conduit and Piping Check: Ensuring all plumbing and electrical conduits are correctly positioned within the slab area.
- Final Approval: The inspector gives final approval to proceed with the concrete pour if everything meets the required standards.
Key Elements Before Checking Pre-Slabs
Before pouring the slab, several elements must be checked to ensure a quality foundation:
- Soil Quality: The soil must be adequately compacted and stable to support the slab and prevent future settling.
- Concrete Mix: The correct concrete mix is crucial for achieving the desired strength and durability.
- Placement: Proper placement of concrete ensures even distribution and prevents weak spots.
- Moisture Level: The moisture level of the concrete mix must be controlled to prevent cracks and ensure a strong bond.
- Additional Key Elements: Reinforcement placement, vapor barriers, and correct slope for drainage are also vital to prevent future structural issues.
What to Expect During Pre-Slab Inspection (As a Property Owner)
On the day of the pre-slab inspection, property owners can expect the inspector to thoroughly check all the preparatory work before the concrete is poured. Here’s what to anticipate:
- Thorough Examination: The inspector will examine the site, reinforcement, and other critical elements.
- Recommendations: If any issues are found, the inspector will provide recommendations or require corrections before the pour.
- Presence: Property owners should be present or have a representative available to address any questions or concerns raised by the inspector.
- Documentation: Keep detailed records of the inspection results and any required changes.
How Long Does the Inspection Usually Take?
The length of the pre-slab inspection process can vary based on several factors:
- Size of the Project: Larger projects may require more time to inspect thoroughly.
- Complexity of the Foundation Design: More complex designs with additional features (e.g., multiple plumbing lines) may take longer to inspect.
- Soil Conditions: Poor soil conditions might necessitate additional inspections or modifications, extending the inspection time.
- Weather Conditions: Inclement weather can delay the inspection or require additional checks, particularly for moisture levels.
- Inspector’s Schedule and Thoroughness: The inspector’s availability and attention to detail can also impact the duration.
What to Do After the Pre-Slab Inspection Takes Place?
After the inspection, property owners should follow these reminders:
- Review the Inspection Report: Carefully review the inspector’s report to understand any issues or corrections needed.
- Address Any Issues Promptly: Make sure to address any identified problems before the concrete is poured.
- Confirm Corrections: If corrections were made, schedule a re-inspection if necessary to ensure everything is up to standard.
- Proceed with Confidence: Once all issues are resolved and the inspection is passed, you can confidently proceed with the concrete pour.
Hiring Pre-Slab Inspection Professionals
Hiring a trusted and quality pre-slab inspection service is essential to ensure that the foundation of your property is sound. Experienced professionals will provide thorough inspections, catch potential issues early, and offer solutions to prevent costly repairs in the future. Their expertise helps ensure that your construction project proceeds smoothly and that the slab foundation meets all necessary standards for safety and durability.